We use cookies to make your experience better. To comply with the new e-Privacy directive, we need to ask for your consent to set the cookies. Learn more.

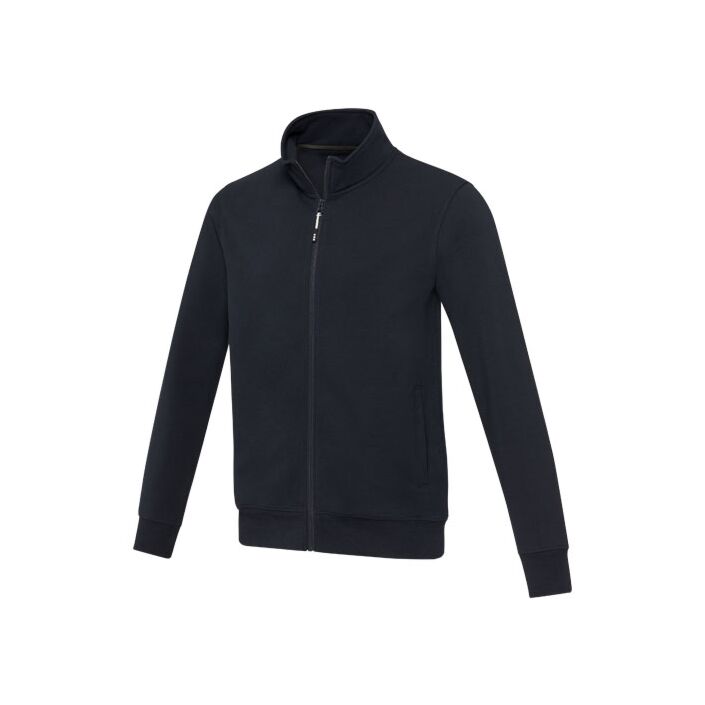
Galena Unisex Aware™ Recycled Full Zip Sweater
In stock
Only %1 left
SKU
37540
As low as
£13.27
The Galena unisex recycled full zip sweater – a perfect fusion of style and functionality. Made of 320 g/m² recycled cotton and recycled polyester. Practicality meets aesthetics with front pockets and a recycled front zipper. The sweater incorporates Cyclo® recycled fibres where they use pre-sorted waste that determines the colour of the yarn. These fibres do not only reduce the demand for virgin resources but also exhibit a commitment to a circular life, embodying the essence of reducing waste and promoting a closed-loop system. Each sweater also comes with an Aware™ tracer. This innovative feature allows users to trace the origins and journey of their item through a QR code, enhancing transparency in the supply chain and fostering a stronger connection between the product and its production process. With environmental awareness growing, the Galena unisex full zip sweater is the ideal choice.
Ask a question
Delivery & Return
Estimated delivery times: 12-26 days (Mainland United Kingdom).
Guaranteed Personalised Service
The Galena unisex recycled full zip sweater – a perfect fusion of style and functionality. Made of 320 g/m² recycled cotton and recycled polyester. Practicality meets aesthetics with front pockets and a recycled front zipper. The sweater incorporates Cyclo® recycled fibres where they use pre-sorted waste that determines the colour of the yarn. These fibres do not only reduce the demand for virgin resources but also exhibit a commitment to a circular life, embodying the essence of reducing waste and promoting a closed-loop system. Each sweater also comes with an Aware™ tracer. This innovative feature allows users to trace the origins and journey of their item through a QR code, enhancing transparency in the supply chain and fostering a stronger connection between the product and its production process. With environmental awareness growing, the Galena unisex full zip sweater is the ideal choice.
Product Details
| HS Code | 6110309900000000000000 |
|---|---|
| Material | Knit of 50% Recycled cotton and 50% Recycled Polyester |
Decoration Settings
| Decoration Packing Individual | No |
|---|---|
| Decoration Mandatory | No |
| Imprint Default | pfc/3754001_2_1_2408.jpg |
| Default Imprint Size | 80 x 80 mm |
| Default Imprint Width | 80 |
| Method | Screenprint |
| Decoration Lead Time | 2 |
Measurements
| Export Height CM | 45 |
|---|---|
| Export Width CM | 32 |
| Export Length CM | 46 |
| Nett Weight | 19 |
| Quantity Per Carton | 15 |
PF Concept
| Clothing features | Neck tape |
|---|
Gift Options
| Allow Gift Message | No |
|---|
Stock
| Color | Blue |
|---|
Printing Options
Screenprint - left chest (Max 2 colours)
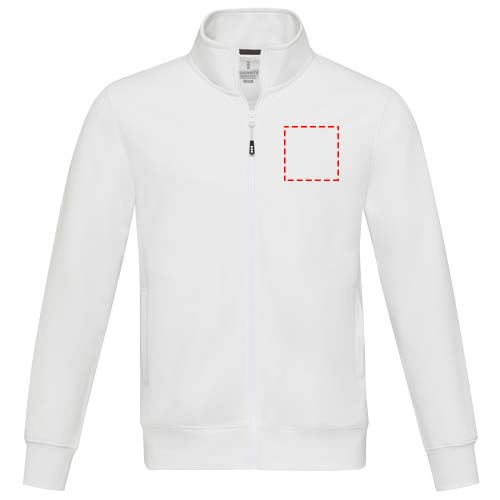
Image file: 3754001_2_1_2408.jpg
Location: left chest
Max Colors: 2
Print Area: 80mm x 80mm
Lead Time: 2
Production Location: PL
Reference ID: 1095
Method Code: 2
Transfer - left chest (Max 1 colours)
Image file: 3754001_7_1_2408.jpg
Location: left chest
Max Colors: 1
Print Area: 100mm x 100mm
Lead Time: 2
Production Location: PL
Reference ID: 1096
Method Code: 7
Embroidery fixed - left chest (Max 12 colours)

Image file: 3754001_42_1_2408.jpg
Location: left chest
Max Colors: 12
Print Area: 78mm x 78mm
Diameter: 110mm
Lead Time: 3
Production Location: PL
Reference ID: 1097
Method Code: 42
DTF Transfer - left chest (Max full color colours)

Image file: 3754001_49_1_2408.jpg
Location: left chest
Max Colors: full color
Print Area: 100mm x 100mm
Lead Time: 2
Production Location: PL
Reference ID: 1098
Method Code: 49
Transfer - right chest (Max 1 colours)
Image file: 3754001_7_1_2409.jpg
Location: right chest
Max Colors: 1
Print Area: 100mm x 100mm
Lead Time: 2
Production Location: PL
Reference ID: 1099
Method Code: 7
DTF Transfer - right chest (Max full color colours)

Image file: 3754001_49_1_2409.jpg
Location: right chest
Max Colors: full color
Print Area: 100mm x 100mm
Lead Time: 2
Production Location: PL
Reference ID: 1100
Method Code: 49
Transfer - high back (Max 1 colours)

Image file: 3754001_7_2_2424.jpg
Location: high back
Max Colors: 1
Print Area: 70mm x 30mm
Lead Time: 2
Production Location: PL
Reference ID: 1101
Method Code: 7
Embroidery fixed - high back (Max 12 colours)
Image file: 3754001_42_2_2424.jpg
Location: high back
Max Colors: 12
Print Area: 70mm x 30mm
Lead Time: 3
Production Location: PL
Reference ID: 1102
Method Code: 42
Screenprint - impact upper back (Max 2 colours)
Image file: 3754001_2_2_2434.jpg
Location: impact upper back
Max Colors: 2
Print Area: 300mm x 320mm
Lead Time: 2
Production Location: PL
Reference ID: 1103
Method Code: 2
Transfer - impact upper back (Max 1 colours)

Image file: 3754001_7_2_2434.jpg
Location: impact upper back
Max Colors: 1
Print Area: 280mm x 230mm
Lead Time: 2
Production Location: PL
Reference ID: 1104
Method Code: 7
Embroidery fixed - impact upper back (Max 12 colours)
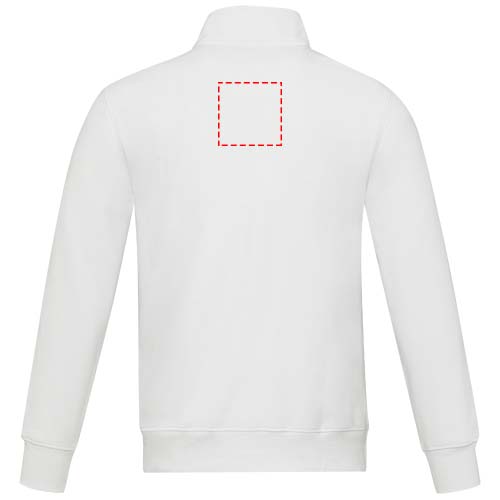
Image file: 3754001_42_2_2434.jpg
Location: impact upper back
Max Colors: 12
Print Area: 99mm x 99mm
Lead Time: 3
Production Location: PL
Reference ID: 1105
Method Code: 42
DTF Transfer - impact upper back (Max full color colours)
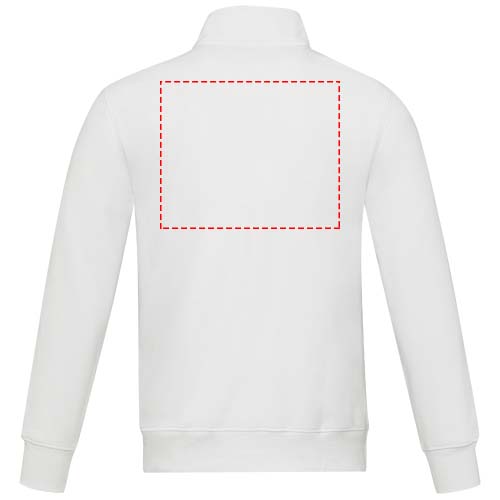
Image file: 3754001_49_2_2434.jpg
Location: impact upper back
Max Colors: full color
Print Area: 280mm x 230mm
Lead Time: 2
Production Location: PL
Reference ID: 1106
Method Code: 49
Screenprint - right bicep (Max 2 colours)
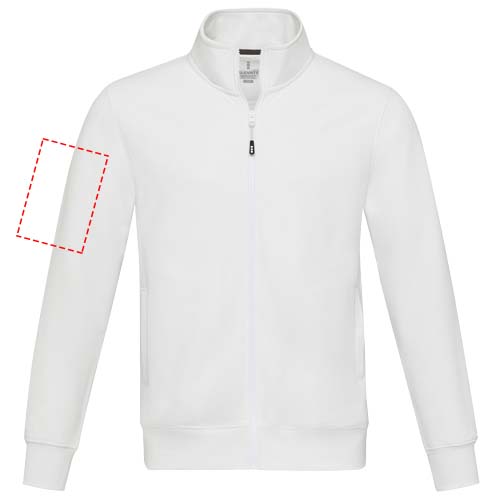
Image file: 3754001_2_12_2412.jpg
Location: right bicep
Max Colors: 2
Print Area: 100mm x 150mm
Lead Time: 2
Production Location: PL
Reference ID: 1107
Method Code: 2
Transfer - right bicep (Max 1 colours)

Image file: 3754001_7_12_2412.jpg
Location: right bicep
Max Colors: 1
Print Area: 90mm x 100mm
Lead Time: 2
Production Location: PL
Reference ID: 1108
Method Code: 7
Embroidery fixed - right bicep (Max 12 colours)
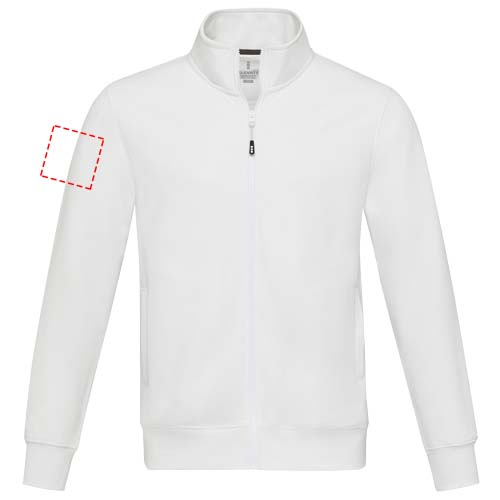
Image file: 3754001_42_12_2412.jpg
Location: right bicep
Max Colors: 12
Print Area: 78mm x 78mm
Lead Time: 3
Production Location: PL
Reference ID: 1109
Method Code: 42
DTF Transfer - right bicep (Max full color colours)
Image file: 3754001_49_12_2412.jpg
Location: right bicep
Max Colors: full color
Print Area: 90mm x 100mm
Lead Time: 2
Production Location: PL
Reference ID: 1110
Method Code: 49
Transfer - left bicep (Max 1 colours)
Image file: 3754001_7_12_2418.jpg
Location: left bicep
Max Colors: 1
Print Area: 90mm x 100mm
Lead Time: 2
Production Location: PL
Reference ID: 1111
Method Code: 7
Embroidery fixed - left bicep (Max 12 colours)
Image file: 3754001_42_12_2418.jpg
Location: left bicep
Max Colors: 12
Print Area: 78mm x 78mm
Lead Time: 3
Production Location: PL
Reference ID: 1112
Method Code: 42
DTF Transfer - left bicep (Max full color colours)

Image file: 3754001_49_12_2418.jpg
Location: left bicep
Max Colors: full color
Print Area: 90mm x 100mm
Lead Time: 2
Production Location: PL
Reference ID: 1113
Method Code: 49
Screenprint - left chest (Max 2 colours)
Image file: 3754001_2_1_2408.jpg
Location: left chest
Max Colors: 2
Print Area: 80mm x 80mm
Lead Time: 2
Production Location: PL
Reference ID: 1095
Method Code: 2
Transfer - left chest (Max 1 colours)
Image file: 3754001_7_1_2408.jpg
Location: left chest
Max Colors: 1
Print Area: 100mm x 100mm
Lead Time: 2
Production Location: PL
Reference ID: 1096
Method Code: 7
Embroidery fixed - left chest (Max 12 colours)
Image file: 3754001_42_1_2408.jpg
Location: left chest
Max Colors: 12
Print Area: 78mm x 78mm
Diameter: 110mm
Lead Time: 3
Production Location: PL
Reference ID: 1097
Method Code: 42
DTF Transfer - left chest (Max full color colours)
Image file: 3754001_49_1_2408.jpg
Location: left chest
Max Colors: full color
Print Area: 100mm x 100mm
Lead Time: 2
Production Location: PL
Reference ID: 1098
Method Code: 49
Transfer - right chest (Max 1 colours)
Image file: 3754001_7_1_2409.jpg
Location: right chest
Max Colors: 1
Print Area: 100mm x 100mm
Lead Time: 2
Production Location: PL
Reference ID: 1099
Method Code: 7
DTF Transfer - right chest (Max full color colours)
Image file: 3754001_49_1_2409.jpg
Location: right chest
Max Colors: full color
Print Area: 100mm x 100mm
Lead Time: 2
Production Location: PL
Reference ID: 1100
Method Code: 49
Transfer - high back (Max 1 colours)
Image file: 3754001_7_2_2424.jpg
Location: high back
Max Colors: 1
Print Area: 70mm x 30mm
Lead Time: 2
Production Location: PL
Reference ID: 1101
Method Code: 7
Embroidery fixed - high back (Max 12 colours)
Image file: 3754001_42_2_2424.jpg
Location: high back
Max Colors: 12
Print Area: 70mm x 30mm
Lead Time: 3
Production Location: PL
Reference ID: 1102
Method Code: 42
Screenprint - impact upper back (Max 2 colours)
Image file: 3754001_2_2_2434.jpg
Location: impact upper back
Max Colors: 2
Print Area: 300mm x 320mm
Lead Time: 2
Production Location: PL
Reference ID: 1103
Method Code: 2
Transfer - impact upper back (Max 1 colours)
Image file: 3754001_7_2_2434.jpg
Location: impact upper back
Max Colors: 1
Print Area: 280mm x 230mm
Lead Time: 2
Production Location: PL
Reference ID: 1104
Method Code: 7
Embroidery fixed - impact upper back (Max 12 colours)
Image file: 3754001_42_2_2434.jpg
Location: impact upper back
Max Colors: 12
Print Area: 99mm x 99mm
Lead Time: 3
Production Location: PL
Reference ID: 1105
Method Code: 42
DTF Transfer - impact upper back (Max full color colours)
Image file: 3754001_49_2_2434.jpg
Location: impact upper back
Max Colors: full color
Print Area: 280mm x 230mm
Lead Time: 2
Production Location: PL
Reference ID: 1106
Method Code: 49
Screenprint - right bicep (Max 2 colours)
Image file: 3754001_2_12_2412.jpg
Location: right bicep
Max Colors: 2
Print Area: 100mm x 150mm
Lead Time: 2
Production Location: PL
Reference ID: 1107
Method Code: 2
Transfer - right bicep (Max 1 colours)
Image file: 3754001_7_12_2412.jpg
Location: right bicep
Max Colors: 1
Print Area: 90mm x 100mm
Lead Time: 2
Production Location: PL
Reference ID: 1108
Method Code: 7
Embroidery fixed - right bicep (Max 12 colours)
Image file: 3754001_42_12_2412.jpg
Location: right bicep
Max Colors: 12
Print Area: 78mm x 78mm
Lead Time: 3
Production Location: PL
Reference ID: 1109
Method Code: 42
DTF Transfer - right bicep (Max full color colours)
Image file: 3754001_49_12_2412.jpg
Location: right bicep
Max Colors: full color
Print Area: 90mm x 100mm
Lead Time: 2
Production Location: PL
Reference ID: 1110
Method Code: 49
Transfer - left bicep (Max 1 colours)
Image file: 3754001_7_12_2418.jpg
Location: left bicep
Max Colors: 1
Print Area: 90mm x 100mm
Lead Time: 2
Production Location: PL
Reference ID: 1111
Method Code: 7
Embroidery fixed - left bicep (Max 12 colours)
Image file: 3754001_42_12_2418.jpg
Location: left bicep
Max Colors: 12
Print Area: 78mm x 78mm
Lead Time: 3
Production Location: PL
Reference ID: 1112
Method Code: 42
DTF Transfer - left bicep (Max full color colours)
Image file: 3754001_49_12_2418.jpg
Location: left bicep
Max Colors: full color
Print Area: 90mm x 100mm
Lead Time: 2
Production Location: PL
Reference ID: 1113
Method Code: 49
Screenprint - left chest (Max 2 colours)

Image file: 3754007_2_1_2408.jpg
Location: left chest
Max Colors: 2
Print Area: 80mm x 80mm
Lead Time: 2
Production Location: PL
Reference ID: 1095
Method Code: 2
Transfer - left chest (Max 1 colours)

Image file: 3754007_7_1_2408.jpg
Location: left chest
Max Colors: 1
Print Area: 100mm x 100mm
Lead Time: 2
Production Location: PL
Reference ID: 1096
Method Code: 7
Embroidery fixed - left chest (Max 12 colours)

Image file: 3754007_42_1_2408.jpg
Location: left chest
Max Colors: 12
Print Area: 78mm x 78mm
Diameter: 110mm
Lead Time: 3
Production Location: PL
Reference ID: 1097
Method Code: 42
DTF Transfer - left chest (Max full color colours)

Image file: 3754007_49_1_2408.jpg
Location: left chest
Max Colors: full color
Print Area: 100mm x 100mm
Lead Time: 2
Production Location: PL
Reference ID: 1098
Method Code: 49
Transfer - right chest (Max 1 colours)

Image file: 3754007_7_1_2409.jpg
Location: right chest
Max Colors: 1
Print Area: 100mm x 100mm
Lead Time: 2
Production Location: PL
Reference ID: 1099
Method Code: 7
DTF Transfer - right chest (Max full color colours)

Image file: 3754007_49_1_2409.jpg
Location: right chest
Max Colors: full color
Print Area: 100mm x 100mm
Lead Time: 2
Production Location: PL
Reference ID: 1100
Method Code: 49
Transfer - high back (Max 1 colours)

Image file: 3754007_7_2_2424.jpg
Location: high back
Max Colors: 1
Print Area: 70mm x 30mm
Lead Time: 2
Production Location: PL
Reference ID: 1101
Method Code: 7
Embroidery fixed - high back (Max 12 colours)

Image file: 3754007_42_2_2424.jpg
Location: high back
Max Colors: 12
Print Area: 70mm x 30mm
Lead Time: 3
Production Location: PL
Reference ID: 1102
Method Code: 42
Screenprint - impact upper back (Max 2 colours)

Image file: 3754007_2_2_2434.jpg
Location: impact upper back
Max Colors: 2
Print Area: 300mm x 320mm
Lead Time: 2
Production Location: PL
Reference ID: 1103
Method Code: 2
Transfer - impact upper back (Max 1 colours)

Image file: 3754007_7_2_2434.jpg
Location: impact upper back
Max Colors: 1
Print Area: 280mm x 230mm
Lead Time: 2
Production Location: PL
Reference ID: 1104
Method Code: 7
Embroidery fixed - impact upper back (Max 12 colours)

Image file: 3754007_42_2_2434.jpg
Location: impact upper back
Max Colors: 12
Print Area: 99mm x 99mm
Lead Time: 3
Production Location: PL
Reference ID: 1105
Method Code: 42
DTF Transfer - impact upper back (Max full color colours)

Image file: 3754007_49_2_2434.jpg
Location: impact upper back
Max Colors: full color
Print Area: 280mm x 230mm
Lead Time: 2
Production Location: PL
Reference ID: 1106
Method Code: 49
Screenprint - right bicep (Max 2 colours)

Image file: 3754007_2_12_2412.jpg
Location: right bicep
Max Colors: 2
Print Area: 100mm x 150mm
Lead Time: 2
Production Location: PL
Reference ID: 1107
Method Code: 2
Transfer - right bicep (Max 1 colours)

Image file: 3754007_7_12_2412.jpg
Location: right bicep
Max Colors: 1
Print Area: 90mm x 100mm
Lead Time: 2
Production Location: PL
Reference ID: 1108
Method Code: 7
Embroidery fixed - right bicep (Max 12 colours)

Image file: 3754007_42_12_2412.jpg
Location: right bicep
Max Colors: 12
Print Area: 78mm x 78mm
Lead Time: 3
Production Location: PL
Reference ID: 1109
Method Code: 42
DTF Transfer - right bicep (Max full color colours)

Image file: 3754007_49_12_2412.jpg
Location: right bicep
Max Colors: full color
Print Area: 90mm x 100mm
Lead Time: 2
Production Location: PL
Reference ID: 1110
Method Code: 49
Transfer - left bicep (Max 1 colours)

Image file: 3754007_7_12_2418.jpg
Location: left bicep
Max Colors: 1
Print Area: 90mm x 100mm
Lead Time: 2
Production Location: PL
Reference ID: 1111
Method Code: 7
Embroidery fixed - left bicep (Max 12 colours)

Image file: 3754007_42_12_2418.jpg
Location: left bicep
Max Colors: 12
Print Area: 78mm x 78mm
Lead Time: 3
Production Location: PL
Reference ID: 1112
Method Code: 42
DTF Transfer - left bicep (Max full color colours)

Image file: 3754007_49_12_2418.jpg
Location: left bicep
Max Colors: full color
Print Area: 90mm x 100mm
Lead Time: 2
Production Location: PL
Reference ID: 1113
Method Code: 49
Screenprint - left chest (Max 2 colours)
Image file: 3754007_2_1_2408.jpg
Location: left chest
Max Colors: 2
Print Area: 80mm x 80mm
Lead Time: 2
Production Location: PL
Reference ID: 1095
Method Code: 2
Transfer - left chest (Max 1 colours)
Image file: 3754007_7_1_2408.jpg
Location: left chest
Max Colors: 1
Print Area: 100mm x 100mm
Lead Time: 2
Production Location: PL
Reference ID: 1096
Method Code: 7
Embroidery fixed - left chest (Max 12 colours)
Image file: 3754007_42_1_2408.jpg
Location: left chest
Max Colors: 12
Print Area: 78mm x 78mm
Diameter: 110mm
Lead Time: 3
Production Location: PL
Reference ID: 1097
Method Code: 42
DTF Transfer - left chest (Max full color colours)
Image file: 3754007_49_1_2408.jpg
Location: left chest
Max Colors: full color
Print Area: 100mm x 100mm
Lead Time: 2
Production Location: PL
Reference ID: 1098
Method Code: 49
Transfer - right chest (Max 1 colours)
Image file: 3754007_7_1_2409.jpg
Location: right chest
Max Colors: 1
Print Area: 100mm x 100mm
Lead Time: 2
Production Location: PL
Reference ID: 1099
Method Code: 7
DTF Transfer - right chest (Max full color colours)
Image file: 3754007_49_1_2409.jpg
Location: right chest
Max Colors: full color
Print Area: 100mm x 100mm
Lead Time: 2
Production Location: PL
Reference ID: 1100
Method Code: 49
Transfer - high back (Max 1 colours)
Image file: 3754007_7_2_2424.jpg
Location: high back
Max Colors: 1
Print Area: 70mm x 30mm
Lead Time: 2
Production Location: PL
Reference ID: 1101
Method Code: 7
Embroidery fixed - high back (Max 12 colours)
Image file: 3754007_42_2_2424.jpg
Location: high back
Max Colors: 12
Print Area: 70mm x 30mm
Lead Time: 3
Production Location: PL
Reference ID: 1102
Method Code: 42
Screenprint - impact upper back (Max 2 colours)
Image file: 3754007_2_2_2434.jpg
Location: impact upper back
Max Colors: 2
Print Area: 300mm x 320mm
Lead Time: 2
Production Location: PL
Reference ID: 1103
Method Code: 2
Transfer - impact upper back (Max 1 colours)
Image file: 3754007_7_2_2434.jpg
Location: impact upper back
Max Colors: 1
Print Area: 280mm x 230mm
Lead Time: 2
Production Location: PL
Reference ID: 1104
Method Code: 7
Embroidery fixed - impact upper back (Max 12 colours)
Image file: 3754007_42_2_2434.jpg
Location: impact upper back
Max Colors: 12
Print Area: 99mm x 99mm
Lead Time: 3
Production Location: PL
Reference ID: 1105
Method Code: 42
DTF Transfer - impact upper back (Max full color colours)
Image file: 3754007_49_2_2434.jpg
Location: impact upper back
Max Colors: full color
Print Area: 280mm x 230mm
Lead Time: 2
Production Location: PL
Reference ID: 1106
Method Code: 49
Screenprint - right bicep (Max 2 colours)
Image file: 3754007_2_12_2412.jpg
Location: right bicep
Max Colors: 2
Print Area: 100mm x 150mm
Lead Time: 2
Production Location: PL
Reference ID: 1107
Method Code: 2
Transfer - right bicep (Max 1 colours)
Image file: 3754007_7_12_2412.jpg
Location: right bicep
Max Colors: 1
Print Area: 90mm x 100mm
Lead Time: 2
Production Location: PL
Reference ID: 1108
Method Code: 7
Embroidery fixed - right bicep (Max 12 colours)
Image file: 3754007_42_12_2412.jpg
Location: right bicep
Max Colors: 12
Print Area: 78mm x 78mm
Lead Time: 3
Production Location: PL
Reference ID: 1109
Method Code: 42
DTF Transfer - right bicep (Max full color colours)
Image file: 3754007_49_12_2412.jpg
Location: right bicep
Max Colors: full color
Print Area: 90mm x 100mm
Lead Time: 2
Production Location: PL
Reference ID: 1110
Method Code: 49
Transfer - left bicep (Max 1 colours)
Image file: 3754007_7_12_2418.jpg
Location: left bicep
Max Colors: 1
Print Area: 90mm x 100mm
Lead Time: 2
Production Location: PL
Reference ID: 1111
Method Code: 7
Embroidery fixed - left bicep (Max 12 colours)
Image file: 3754007_42_12_2418.jpg
Location: left bicep
Max Colors: 12
Print Area: 78mm x 78mm
Lead Time: 3
Production Location: PL
Reference ID: 1112
Method Code: 42
DTF Transfer - left bicep (Max full color colours)
Image file: 3754007_49_12_2418.jpg
Location: left bicep
Max Colors: full color
Print Area: 90mm x 100mm
Lead Time: 2
Production Location: PL
Reference ID: 1113
Method Code: 49
Screenprint - left chest (Max 2 colours)

Image file: 3754055_2_1_2408.jpg
Location: left chest
Max Colors: 2
Print Area: 80mm x 80mm
Lead Time: 2
Production Location: PL
Reference ID: 1095
Method Code: 2
Transfer - left chest (Max 1 colours)

Image file: 3754055_7_1_2408.jpg
Location: left chest
Max Colors: 1
Print Area: 100mm x 100mm
Lead Time: 2
Production Location: PL
Reference ID: 1096
Method Code: 7
Embroidery fixed - left chest (Max 12 colours)

Image file: 3754055_42_1_2408.jpg
Location: left chest
Max Colors: 12
Print Area: 78mm x 78mm
Diameter: 110mm
Lead Time: 3
Production Location: PL
Reference ID: 1097
Method Code: 42
DTF Transfer - left chest (Max full color colours)

Image file: 3754055_49_1_2408.jpg
Location: left chest
Max Colors: full color
Print Area: 100mm x 100mm
Lead Time: 2
Production Location: PL
Reference ID: 1098
Method Code: 49
Transfer - right chest (Max 1 colours)

Image file: 3754055_7_1_2409.jpg
Location: right chest
Max Colors: 1
Print Area: 100mm x 100mm
Lead Time: 2
Production Location: PL
Reference ID: 1099
Method Code: 7
DTF Transfer - right chest (Max full color colours)

Image file: 3754055_49_1_2409.jpg
Location: right chest
Max Colors: full color
Print Area: 100mm x 100mm
Lead Time: 2
Production Location: PL
Reference ID: 1100
Method Code: 49
Transfer - high back (Max 1 colours)

Image file: 3754055_7_2_2424.jpg
Location: high back
Max Colors: 1
Print Area: 70mm x 30mm
Lead Time: 2
Production Location: PL
Reference ID: 1101
Method Code: 7
Embroidery fixed - high back (Max 12 colours)

Image file: 3754055_42_2_2424.jpg
Location: high back
Max Colors: 12
Print Area: 70mm x 30mm
Lead Time: 3
Production Location: PL
Reference ID: 1102
Method Code: 42
Screenprint - impact upper back (Max 2 colours)

Image file: 3754055_2_2_2434.jpg
Location: impact upper back
Max Colors: 2
Print Area: 300mm x 320mm
Lead Time: 2
Production Location: PL
Reference ID: 1103
Method Code: 2
Transfer - impact upper back (Max 1 colours)

Image file: 3754055_7_2_2434.jpg
Location: impact upper back
Max Colors: 1
Print Area: 280mm x 230mm
Lead Time: 2
Production Location: PL
Reference ID: 1104
Method Code: 7
Embroidery fixed - impact upper back (Max 12 colours)

Image file: 3754055_42_2_2434.jpg
Location: impact upper back
Max Colors: 12
Print Area: 99mm x 99mm
Lead Time: 3
Production Location: PL
Reference ID: 1105
Method Code: 42
DTF Transfer - impact upper back (Max full color colours)

Image file: 3754055_49_2_2434.jpg
Location: impact upper back
Max Colors: full color
Print Area: 280mm x 230mm
Lead Time: 2
Production Location: PL
Reference ID: 1106
Method Code: 49
Screenprint - right bicep (Max 2 colours)

Image file: 3754055_2_12_2412.jpg
Location: right bicep
Max Colors: 2
Print Area: 100mm x 150mm
Lead Time: 2
Production Location: PL
Reference ID: 1107
Method Code: 2
Transfer - right bicep (Max 1 colours)

Image file: 3754055_7_12_2412.jpg
Location: right bicep
Max Colors: 1
Print Area: 90mm x 100mm
Lead Time: 2
Production Location: PL
Reference ID: 1108
Method Code: 7
Embroidery fixed - right bicep (Max 12 colours)

Image file: 3754055_42_12_2412.jpg
Location: right bicep
Max Colors: 12
Print Area: 78mm x 78mm
Lead Time: 3
Production Location: PL
Reference ID: 1109
Method Code: 42
DTF Transfer - right bicep (Max full color colours)

Image file: 3754055_49_12_2412.jpg
Location: right bicep
Max Colors: full color
Print Area: 90mm x 100mm
Lead Time: 2
Production Location: PL
Reference ID: 1110
Method Code: 49
Transfer - left bicep (Max 1 colours)

Image file: 3754055_7_12_2418.jpg
Location: left bicep
Max Colors: 1
Print Area: 90mm x 100mm
Lead Time: 2
Production Location: PL
Reference ID: 1111
Method Code: 7
Embroidery fixed - left bicep (Max 12 colours)

Image file: 3754055_42_12_2418.jpg
Location: left bicep
Max Colors: 12
Print Area: 78mm x 78mm
Lead Time: 3
Production Location: PL
Reference ID: 1112
Method Code: 42
DTF Transfer - left bicep (Max full color colours)

Image file: 3754055_49_12_2418.jpg
Location: left bicep
Max Colors: full color
Print Area: 90mm x 100mm
Lead Time: 2
Production Location: PL
Reference ID: 1113
Method Code: 49
Screenprint - left chest (Max 2 colours)
Image file: 3754055_2_1_2408.jpg
Location: left chest
Max Colors: 2
Print Area: 80mm x 80mm
Lead Time: 2
Production Location: PL
Reference ID: 1095
Method Code: 2
Transfer - left chest (Max 1 colours)
Image file: 3754055_7_1_2408.jpg
Location: left chest
Max Colors: 1
Print Area: 100mm x 100mm
Lead Time: 2
Production Location: PL
Reference ID: 1096
Method Code: 7
Embroidery fixed - left chest (Max 12 colours)
Image file: 3754055_42_1_2408.jpg
Location: left chest
Max Colors: 12
Print Area: 78mm x 78mm
Diameter: 110mm
Lead Time: 3
Production Location: PL
Reference ID: 1097
Method Code: 42
DTF Transfer - left chest (Max full color colours)
Image file: 3754055_49_1_2408.jpg
Location: left chest
Max Colors: full color
Print Area: 100mm x 100mm
Lead Time: 2
Production Location: PL
Reference ID: 1098
Method Code: 49
Transfer - right chest (Max 1 colours)
Image file: 3754055_7_1_2409.jpg
Location: right chest
Max Colors: 1
Print Area: 100mm x 100mm
Lead Time: 2
Production Location: PL
Reference ID: 1099
Method Code: 7
DTF Transfer - right chest (Max full color colours)
Image file: 3754055_49_1_2409.jpg
Location: right chest
Max Colors: full color
Print Area: 100mm x 100mm
Lead Time: 2
Production Location: PL
Reference ID: 1100
Method Code: 49
Transfer - high back (Max 1 colours)
Image file: 3754055_7_2_2424.jpg
Location: high back
Max Colors: 1
Print Area: 70mm x 30mm
Lead Time: 2
Production Location: PL
Reference ID: 1101
Method Code: 7
Embroidery fixed - high back (Max 12 colours)
Image file: 3754055_42_2_2424.jpg
Location: high back
Max Colors: 12
Print Area: 70mm x 30mm
Lead Time: 3
Production Location: PL
Reference ID: 1102
Method Code: 42
Screenprint - impact upper back (Max 2 colours)
Image file: 3754055_2_2_2434.jpg
Location: impact upper back
Max Colors: 2
Print Area: 300mm x 320mm
Lead Time: 2
Production Location: PL
Reference ID: 1103
Method Code: 2
Transfer - impact upper back (Max 1 colours)
Image file: 3754055_7_2_2434.jpg
Location: impact upper back
Max Colors: 1
Print Area: 280mm x 230mm
Lead Time: 2
Production Location: PL
Reference ID: 1104
Method Code: 7
Embroidery fixed - impact upper back (Max 12 colours)
Image file: 3754055_42_2_2434.jpg
Location: impact upper back
Max Colors: 12
Print Area: 99mm x 99mm
Lead Time: 3
Production Location: PL
Reference ID: 1105
Method Code: 42
DTF Transfer - impact upper back (Max full color colours)
Image file: 3754055_49_2_2434.jpg
Location: impact upper back
Max Colors: full color
Print Area: 280mm x 230mm
Lead Time: 2
Production Location: PL
Reference ID: 1106
Method Code: 49
Screenprint - right bicep (Max 2 colours)
Image file: 3754055_2_12_2412.jpg
Location: right bicep
Max Colors: 2
Print Area: 100mm x 150mm
Lead Time: 2
Production Location: PL
Reference ID: 1107
Method Code: 2
Transfer - right bicep (Max 1 colours)
Image file: 3754055_7_12_2412.jpg
Location: right bicep
Max Colors: 1
Print Area: 90mm x 100mm
Lead Time: 2
Production Location: PL
Reference ID: 1108
Method Code: 7
Embroidery fixed - right bicep (Max 12 colours)
Image file: 3754055_42_12_2412.jpg
Location: right bicep
Max Colors: 12
Print Area: 78mm x 78mm
Lead Time: 3
Production Location: PL
Reference ID: 1109
Method Code: 42
DTF Transfer - right bicep (Max full color colours)
Image file: 3754055_49_12_2412.jpg
Location: right bicep
Max Colors: full color
Print Area: 90mm x 100mm
Lead Time: 2
Production Location: PL
Reference ID: 1110
Method Code: 49
Transfer - left bicep (Max 1 colours)
Image file: 3754055_7_12_2418.jpg
Location: left bicep
Max Colors: 1
Print Area: 90mm x 100mm
Lead Time: 2
Production Location: PL
Reference ID: 1111
Method Code: 7
Embroidery fixed - left bicep (Max 12 colours)
Image file: 3754055_42_12_2418.jpg
Location: left bicep
Max Colors: 12
Print Area: 78mm x 78mm
Lead Time: 3
Production Location: PL
Reference ID: 1112
Method Code: 42
DTF Transfer - left bicep (Max full color colours)
Image file: 3754055_49_12_2418.jpg
Location: left bicep
Max Colors: full color
Print Area: 90mm x 100mm
Lead Time: 2
Production Location: PL
Reference ID: 1113
Method Code: 49
Screenprint - left chest (Max 2 colours)

Image file: 3754090_2_1_2408.jpg
Location: left chest
Max Colors: 2
Print Area: 80mm x 80mm
Lead Time: 2
Production Location: PL
Reference ID: 1095
Method Code: 2
Transfer - left chest (Max 1 colours)

Image file: 3754090_7_1_2408.jpg
Location: left chest
Max Colors: 1
Print Area: 100mm x 100mm
Lead Time: 2
Production Location: PL
Reference ID: 1096
Method Code: 7
Embroidery fixed - left chest (Max 12 colours)

Image file: 3754090_42_1_2408.jpg
Location: left chest
Max Colors: 12
Print Area: 78mm x 78mm
Diameter: 110mm
Lead Time: 3
Production Location: PL
Reference ID: 1097
Method Code: 42
DTF Transfer - left chest (Max full color colours)

Image file: 3754090_49_1_2408.jpg
Location: left chest
Max Colors: full color
Print Area: 100mm x 100mm
Lead Time: 2
Production Location: PL
Reference ID: 1098
Method Code: 49
Transfer - right chest (Max 1 colours)

Image file: 3754090_7_1_2409.jpg
Location: right chest
Max Colors: 1
Print Area: 100mm x 100mm
Lead Time: 2
Production Location: PL
Reference ID: 1099
Method Code: 7
DTF Transfer - right chest (Max full color colours)

Image file: 3754090_49_1_2409.jpg
Location: right chest
Max Colors: full color
Print Area: 100mm x 100mm
Lead Time: 2
Production Location: PL
Reference ID: 1100
Method Code: 49
Transfer - high back (Max 1 colours)

Image file: 3754090_7_2_2424.jpg
Location: high back
Max Colors: 1
Print Area: 70mm x 30mm
Lead Time: 2
Production Location: PL
Reference ID: 1101
Method Code: 7
Embroidery fixed - high back (Max 12 colours)

Image file: 3754090_42_2_2424.jpg
Location: high back
Max Colors: 12
Print Area: 70mm x 30mm
Lead Time: 3
Production Location: PL
Reference ID: 1102
Method Code: 42
Screenprint - impact upper back (Max 2 colours)

Image file: 3754090_2_2_2434.jpg
Location: impact upper back
Max Colors: 2
Print Area: 300mm x 320mm
Lead Time: 2
Production Location: PL
Reference ID: 1103
Method Code: 2
Transfer - impact upper back (Max 1 colours)

Image file: 3754090_7_2_2434.jpg
Location: impact upper back
Max Colors: 1
Print Area: 280mm x 230mm
Lead Time: 2
Production Location: PL
Reference ID: 1104
Method Code: 7
Embroidery fixed - impact upper back (Max 12 colours)

Image file: 3754090_42_2_2434.jpg
Location: impact upper back
Max Colors: 12
Print Area: 99mm x 99mm
Lead Time: 3
Production Location: PL
Reference ID: 1105
Method Code: 42
DTF Transfer - impact upper back (Max full color colours)

Image file: 3754090_49_2_2434.jpg
Location: impact upper back
Max Colors: full color
Print Area: 280mm x 230mm
Lead Time: 2
Production Location: PL
Reference ID: 1106
Method Code: 49
Screenprint - right bicep (Max 2 colours)

Image file: 3754090_2_12_2412.jpg
Location: right bicep
Max Colors: 2
Print Area: 100mm x 150mm
Lead Time: 2
Production Location: PL
Reference ID: 1107
Method Code: 2
Transfer - right bicep (Max 1 colours)

Image file: 3754090_7_12_2412.jpg
Location: right bicep
Max Colors: 1
Print Area: 90mm x 100mm
Lead Time: 2
Production Location: PL
Reference ID: 1108
Method Code: 7
Embroidery fixed - right bicep (Max 12 colours)

Image file: 3754090_42_12_2412.jpg
Location: right bicep
Max Colors: 12
Print Area: 78mm x 78mm
Lead Time: 3
Production Location: PL
Reference ID: 1109
Method Code: 42
DTF Transfer - right bicep (Max full color colours)

Image file: 3754090_49_12_2412.jpg
Location: right bicep
Max Colors: full color
Print Area: 90mm x 100mm
Lead Time: 2
Production Location: PL
Reference ID: 1110
Method Code: 49
Transfer - left bicep (Max 1 colours)

Image file: 3754090_7_12_2418.jpg
Location: left bicep
Max Colors: 1
Print Area: 90mm x 100mm
Lead Time: 2
Production Location: PL
Reference ID: 1111
Method Code: 7
Embroidery fixed - left bicep (Max 12 colours)

Image file: 3754090_42_12_2418.jpg
Location: left bicep
Max Colors: 12
Print Area: 78mm x 78mm
Lead Time: 3
Production Location: PL
Reference ID: 1112
Method Code: 42
DTF Transfer - left bicep (Max full color colours)

Image file: 3754090_49_12_2418.jpg
Location: left bicep
Max Colors: full color
Print Area: 90mm x 100mm
Lead Time: 2
Production Location: PL
Reference ID: 1113
Method Code: 49
Screenprint - left chest (Max 2 colours)
Image file: 3754090_2_1_2408.jpg
Location: left chest
Max Colors: 2
Print Area: 80mm x 80mm
Lead Time: 2
Production Location: PL
Reference ID: 1095
Method Code: 2
Transfer - left chest (Max 1 colours)
Image file: 3754090_7_1_2408.jpg
Location: left chest
Max Colors: 1
Print Area: 100mm x 100mm
Lead Time: 2
Production Location: PL
Reference ID: 1096
Method Code: 7
Embroidery fixed - left chest (Max 12 colours)
Image file: 3754090_42_1_2408.jpg
Location: left chest
Max Colors: 12
Print Area: 78mm x 78mm
Diameter: 110mm
Lead Time: 3
Production Location: PL
Reference ID: 1097
Method Code: 42
DTF Transfer - left chest (Max full color colours)
Image file: 3754090_49_1_2408.jpg
Location: left chest
Max Colors: full color
Print Area: 100mm x 100mm
Lead Time: 2
Production Location: PL
Reference ID: 1098
Method Code: 49
Transfer - right chest (Max 1 colours)
Image file: 3754090_7_1_2409.jpg
Location: right chest
Max Colors: 1
Print Area: 100mm x 100mm
Lead Time: 2
Production Location: PL
Reference ID: 1099
Method Code: 7
DTF Transfer - right chest (Max full color colours)
Image file: 3754090_49_1_2409.jpg
Location: right chest
Max Colors: full color
Print Area: 100mm x 100mm
Lead Time: 2
Production Location: PL
Reference ID: 1100
Method Code: 49
Transfer - high back (Max 1 colours)
Image file: 3754090_7_2_2424.jpg
Location: high back
Max Colors: 1
Print Area: 70mm x 30mm
Lead Time: 2
Production Location: PL
Reference ID: 1101
Method Code: 7
Embroidery fixed - high back (Max 12 colours)
Image file: 3754090_42_2_2424.jpg
Location: high back
Max Colors: 12
Print Area: 70mm x 30mm
Lead Time: 3
Production Location: PL
Reference ID: 1102
Method Code: 42
Screenprint - impact upper back (Max 2 colours)
Image file: 3754090_2_2_2434.jpg
Location: impact upper back
Max Colors: 2
Print Area: 300mm x 320mm
Lead Time: 2
Production Location: PL
Reference ID: 1103
Method Code: 2
Transfer - impact upper back (Max 1 colours)
Image file: 3754090_7_2_2434.jpg
Location: impact upper back
Max Colors: 1
Print Area: 280mm x 230mm
Lead Time: 2
Production Location: PL
Reference ID: 1104
Method Code: 7
Embroidery fixed - impact upper back (Max 12 colours)
Image file: 3754090_42_2_2434.jpg
Location: impact upper back
Max Colors: 12
Print Area: 99mm x 99mm
Lead Time: 3
Production Location: PL
Reference ID: 1105
Method Code: 42
DTF Transfer - impact upper back (Max full color colours)
Image file: 3754090_49_2_2434.jpg
Location: impact upper back
Max Colors: full color
Print Area: 280mm x 230mm
Lead Time: 2
Production Location: PL
Reference ID: 1106
Method Code: 49
Screenprint - right bicep (Max 2 colours)
Image file: 3754090_2_12_2412.jpg
Location: right bicep
Max Colors: 2
Print Area: 100mm x 150mm
Lead Time: 2
Production Location: PL
Reference ID: 1107
Method Code: 2
Transfer - right bicep (Max 1 colours)
Image file: 3754090_7_12_2412.jpg
Location: right bicep
Max Colors: 1
Print Area: 90mm x 100mm
Lead Time: 2
Production Location: PL
Reference ID: 1108
Method Code: 7
Embroidery fixed - right bicep (Max 12 colours)
Image file: 3754090_42_12_2412.jpg
Location: right bicep
Max Colors: 12
Print Area: 78mm x 78mm
Lead Time: 3
Production Location: PL
Reference ID: 1109
Method Code: 42
DTF Transfer - right bicep (Max full color colours)
Image file: 3754090_49_12_2412.jpg
Location: right bicep
Max Colors: full color
Print Area: 90mm x 100mm
Lead Time: 2
Production Location: PL
Reference ID: 1110
Method Code: 49
Transfer - left bicep (Max 1 colours)
Image file: 3754090_7_12_2418.jpg
Location: left bicep
Max Colors: 1
Print Area: 90mm x 100mm
Lead Time: 2
Production Location: PL
Reference ID: 1111
Method Code: 7
Embroidery fixed - left bicep (Max 12 colours)
Image file: 3754090_42_12_2418.jpg
Location: left bicep
Max Colors: 12
Print Area: 78mm x 78mm
Lead Time: 3
Production Location: PL
Reference ID: 1112
Method Code: 42
DTF Transfer - left bicep (Max full color colours)
Image file: 3754090_49_12_2418.jpg
Location: left bicep
Max Colors: full color
Print Area: 90mm x 100mm
Lead Time: 2
Production Location: PL
Reference ID: 1113
Method Code: 49
